This pumpkin spice sensory bin is a treat for hands and noses! Also, be sure to check out this pumpkin slime. It’s deliciously scented!
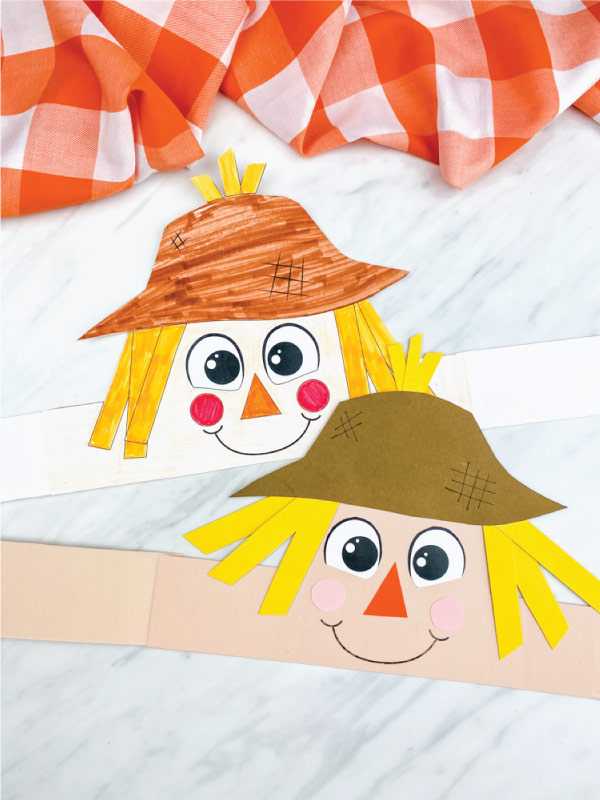
Cut a few thinner hair pieces for the top of the hat, then glue them together like in the picture. Glue this to the top, back of the scarecrow’s hat.
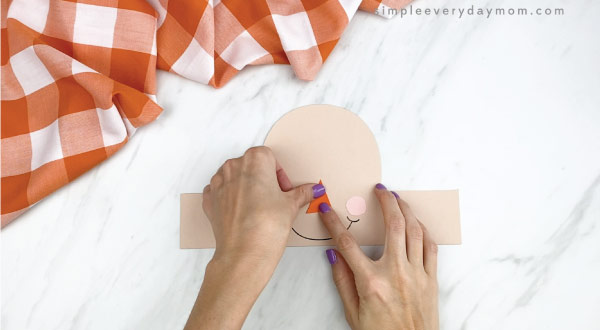
Take the completed scarecrow hat and glue it just above his eyes.
Download the scarecrow headband template, print and cut out the pieces you’ll need for this project.
Sensory Activities
We’re certain these fall crafts and activities are a fun way to have your preschooler learn at home!
Printables like these fall preschool printables or these fall worksheets for preschoolers are a simple, low, or no-prep way to help kids learn.
We’re giving you a free printable template that comes in 2 versions. Option #1 is great if you want to make a paper craft.
Choose one or two a day and spread them out for even more than a week of fun learning!

Gross motor skills help develop strength, coordination, and core stability in our larger muscle groups. Our larger muscles help provide the support and stability needed for us to use our smaller muscles. In other words, gross motor skills support fine motor skills! In addition, gross motor movements also work on skills like crossing midline, which is important for developing a dominant hand and writing. The 10 motor movements children are asked to imitate in the poem also help warm-up muscles, increase body awareness, and prepare their bodies for work.
In this mini packet, you will have access to the developmental progression of cutting skills! Being able to cut shapes is considered an important cutting skill for children! On page 4 of this packet, the child will be able to practice cutting shapes like a circle, square, triangle, and pentagon. In addition, you have an added bonus activity on page 5.
For instance, the 15 circles on this worksheet can be used a variety of ways! Certainly, you can make the activity more challenging depending on what you use and how you set up the task!
This is a FREE 6 Page Downloadable PDF. Click HERE to access the FREEBIE LIBRARY!
Moving Right Along with our Scarecrow Theme is WRITING ACTIVITIES!

If you are looking at completing all 4 activities, I would go in this order:
A developmental guide for the progression of writing skills is provided in the pack!
It’s time for more fall fun with these Scarecrow Theme Ideas! This is a FREE mini pack with activities to address fine motor skills, cutting skills, AND writing activities.
On the handwriting printable, the child will be asked to copy a simple 5 word sentence. Boxed boundaries are provided to assist with letters size. There’s a thick baseline to encourage letters sitting on the lines. Proper letter formation should also be encouraged as well as a proper grip on the writing utensil. If your child struggles with a proper grasp and you’re looking for a pencil grip, one of my all time favorites is the claw grip! Make sure you get the appropriate size for your child.

The scarecrow–themed lesson plan is designed for children ages 3-6, but many activities can be adapted for older children (extensions for older children will be in red text). This lesson plan includes: Introductions, Literacy, Math, Science, Crafts, Music/Action Song, and Scarecrow Book Suggestions.
Area of Study: Fine Arts, Language Arts, Math, Science, Social Studies, Fine Motor Skills. Ages: 3-6 (extensions for older kids).
When the crows come out you’ll hear me shout,
(children cup hands near mouth)
Materials needed: One copy of the Wikki Stix Scarecrow Matching Cards (separate download here) and scissors.
Literacy

Beginning Letters: Print the Scarecrow Beginning Letters (separate download here) to heavy paper. Laminate the cards for durability and cut them out. As the children become familiar with the scarecrow faces, ask what letter the "feelings" words begin with: Happy, Sad, Scared, and Mad. Have the children make the beginning letter with Wikki Stix and place it beside the corresponding scarecrow card.
For older children: Have the children close their eyes and listen to the Wikki Stix Sound Sticks (one at a time). See if the children can determine what items are attached to the Wikki Stix by the sound that it makes.
Many farmers use metal pie plates or other metal items to decorate a scarecrow. Ask the children if they might know why farmers add pie plates (or other metal items) to the scarecrow. Items are generally hung from the scarecrow so that when the wind blows, the metal items will clang together and the sound will scare the crows (birds, in general). Ask the children what sounds they have heard that have scared them in the past? Most young children do not like very loud sounds (such as sirens or loud thunder claps).

Set out assorted Wikki Stix and invite the children to completely cover the rippled edge of the paper plate. The Wikki Stix will adhere the last two parts of the craft together (no glue is necessary). Attach the Wikki Stix covered paper plate edge around the top and sides of the inner paper plate circle. The upper part of the scarecrow’s hat can be attached behind the paper plate edge (see photo).
Materials needed: One copy of the Scarecrow Patterns (separate download here), scissors, and assorted Wikki Stix.
The scarecrows make adorable crafts to display for fall celebrations or Thanksgiving!
Materials needed: 2 paper plates per craft, scissors, and assorted colors of Wikki Stix.
Science

"HEY YOU CROWS, YOU’D BETTER GET OUT!"
(children point as if talking to the crows)
The second table in the file is intentionally left blank. Older children can create Wikki Stix scarecrows for their own patterning page (see photo below).
Print the Wikki Stix Scarecrow Matching Cards to heavy paper and laminate for durability. Have the children cut along the dotted lines to make 8 individual cards. Discuss the scarecrow "faces" on the cards with your child. Invite the children to explain how the scarecrow might be feeling simply by looking at one of the cards. The cards have faces for: Happy, Sad, Scared, and Mad. Ask the children about times when they have felt: happy, sad, scared, or mad. We can learn a great deal about our children by allowing them time to reflect and discuss. For older children, have the children select a scarecrow card and write about a time when they experienced a feeling that corresponds with the face on the card.
Introductions
Using scarecrows as a fall theme for learning is not only fun for kids, but it is a wonderful way to incorporate lessons on feelings at home or in the classroom. A scarecrow gets its name from the duty it performs
My daughter’s is prominently displayed as part of our fall decor 🙂
Sign up above and receive all new No Time for Flashcards posts directly in your email inbox.
Love this…I’m a 61 year old grandma (Honey) and I keep 5 of my 15 grands. I’m always looking for easy seasonal crafts that won’t break the bank! thanks
This is so pretty! And it is perfect to combine with my harvest bulletin board that I have been making! Beautiful!
20 Comments
[…] Time for Flash Cards shares this cute paper plate scarecrow. What’s wonderful about this craft is that it uses materials with different textures, so […]
Toddlers are exploring their world with all their senses and doing activities that incorporate different textures is a great way to explore while creating. When I asked my daughter what she wanted to make she very confidently said a scarecrow. We’ve been zooming past them at the store and I told her we’d make one , obviously she remembered. I didn’t just want to make a cut and paste scarecrow so I gathered materials with various textures and a plain old paper plate and this is what we made.
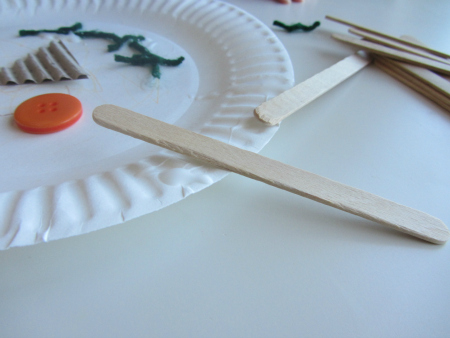
- Gather your materials. You will need a paper plate, crayons, glue, scissors, yarn, buttons, some textured paper , felt and yellow construction paper. I had popsicle sticks for hair but as you will see they didn’t work out.
- Let your child explore all the materials. Ask them how they feel and introduce new words to them by labeling the items as they are exploring.
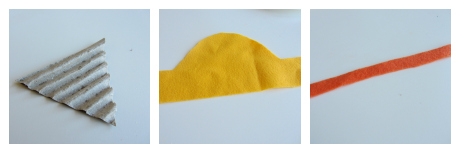
- While your child colors the scarecrow with crayons cut out a nose from the textured paper, hair from the construction paper , yarn for the mouth, a felt hat and strip for the hat.
- Hand them the glue start with the eyes.
- Pop them on.
- Add the nose and the mouth.
- If your child is up for the challenge hand them smaller pieces of yarn to make a stitched mouth. I decided to test the waters and see if my daughter could do this. She has been doing a lot of self directed fine motor tasks so I thought why not try. She did so well and was very proud of herself.
- Add the hair. We started with popscicle sticks but they were too heavy so we switched to paper hair.
- Add the felt hat.
- Let dry.
[…] For Toddlers Pumpkin Printing Thanksgiving Sensory Tub Candy Corn Math Tray Shape Turkey Craft Paper Plate Scarecrow Fine Motor Turkey Craft Marshmallow Indian Corn Potato Print Turkey Pilgrim Hat Cookies /* […]